wind vane, first version
ArticleCategory: [Choose a category, do not translate
this]
Hardware
AuthorImage:[Here we need a little image from you]
![[Photo of the Author]](../../common/images/Guido-S.gif)
TranslationInfo:[Author + translation history. mailto: or
http://homepage]
original in en Guido Socher
AboutTheAuthor:[A small biography about the author]
Guido likes Linux because it is a really good system to
develop your own hardware.
Abstract:[Here you write a little summary]
Traditional wind measurement equipment for weather stations
consists of a wind vane (wind direction) and a cup anemometer
(wind speed). But it's kind of boring to just build what others
have done already. There are also some mechanical problems:
- A good wind vane and cup anemometer would require water
proof ball bearings. They are not easy to get.
- It is not so straight forward to build a sensor that can
measure an angle and be turned around infinetly. Something
like that would be required for the wind vane. Proffesional
wind vanes seem to use a potentiometer which can be turnded
entlessly. ...but where to buy such a special
potentiometer?
This it was very interessting to build this wind direction
meter. I observed a few things that I did not expect at the
beginning. It failed however because the switches which I used
failed after just 3 month. The actual idea was not that bad --
it worked.
ArticleIllustration:[This is the title picture for your
article]
![[Illustration]](../../common/images2/article07041/wind-vane-v01-2007-02-18_1241-078.jpg)
ArticleBody:[The article body]
The idea
It is probaly not important to measure exactly from which angle
the wind is comming. Just an indcation of noth, west, east,
south and one value inbetween would be good enough. This can be
done with just 4 switches. An inbetween value, e.g north-west
is detect when both the switch for north and west are pressed.
My idea was to build something like this:
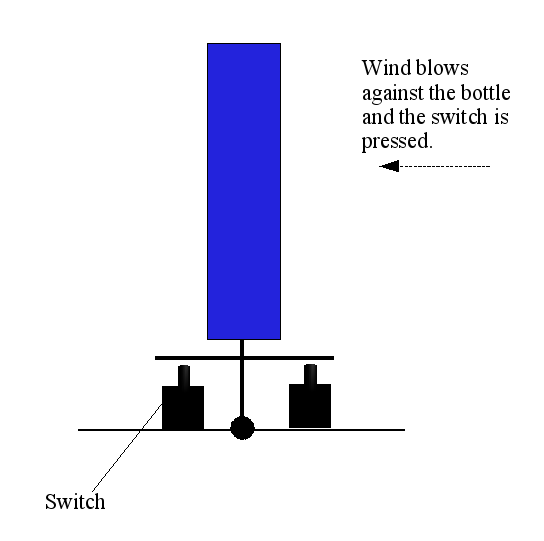
A bottle as wind "wind vane". The picture shows the
situation without wind. With wind from the right the bottle
would tilt to the left.
The added benefit of this equipment would be that it will not
only indicate the direction from which the wind is comming but
also give no reading when there is no wind. The switches have
to "soft enough" to trigger already at very little wind but
that should not be a problem.
Building it...
This is how I made that "bottle wind vane".
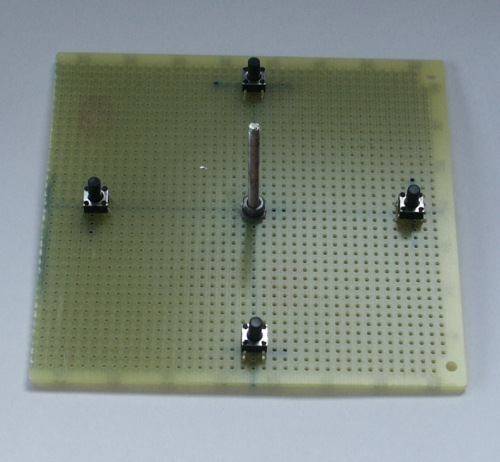
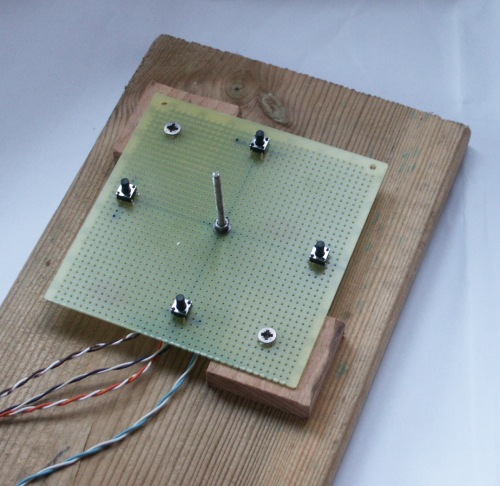
4 dip switches and a long screw in the middle. There are
some rubber washers under the screw. The screw can therefore
tilt a bit.
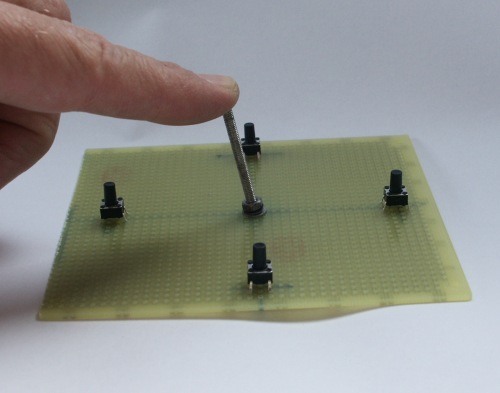
How the screw tilts thanks to the rubber washers.
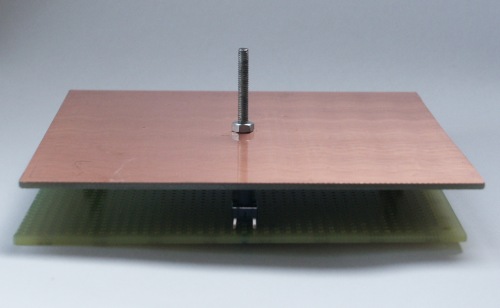
A second board which will press the switches. It will also
protect the switches from rain.
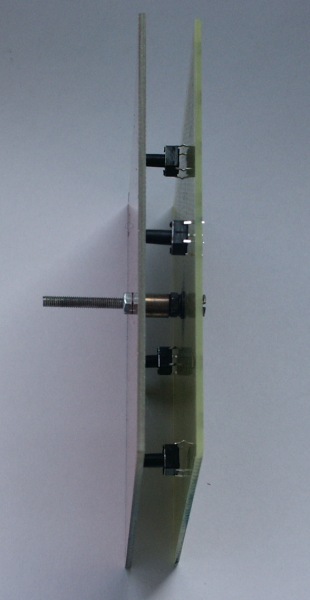
Side-view.
Mount it on a solid wooden board.
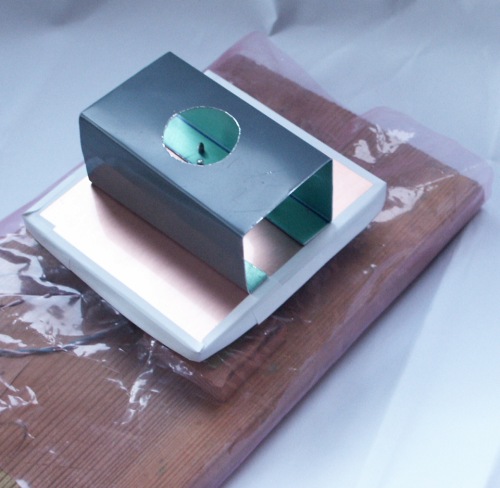
The bottle holder and a plastic foil for better protection
of the electrical parts against rain.
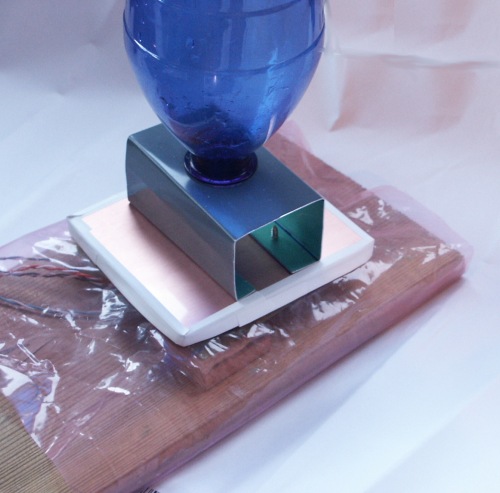
It's ready.
Mount it outside on a high point (4m above ground).
The outcome
This project was successful because the idea as such worked.
Just the switches failed. Why was that?
The interssting thing about this bottle wind vane was that it
did not quite behave as I expected. I though that once the wind
is strong enough to tilt the board and click a switch it will
stay that way for a longer period of time. This is however not
the case. The wind is never constant or steady. Even strong
wind comes in short waves.
With very little wind the switches would be pressed
occasionally and with stong wind the switches would be pressed
very frequently. On a windy day the switch oposite to the wind
direction would be pressed a 100000 times. Winds come here
mostly from the west. The switch indicating west-wind failed
therefore after 3 windy winter month.
I did not expect that the wind comes near ground (4m above
ground) always in such waves. It is kind of logical to expect
this if you remember how trees swing back and forth in the wind
but I had never really tought about this. Tranditional wind
speed measurements never show that. A wind mill or a cup
anemometer will always measure just an average wind speed.
At the same time this is a very good behaviour because I could
use that equipment to measure also wind speed. Not exact wind
speeds but something along the terms of "low wind" or "strong
wind".
Conclusion
It failed because switches are not durable enough but the idea
as such was good. I will re-desing it and find a replacement
for the switches.